An SSH tunnel is used to route unencrypted traffic through an encrypted SSH channel. Its comes in handy for routing traffic over untrusted or hostile networks as the data is encrypted to maintain privacy and prevent eavesdropping. It is also very handy in for bypassing firewall restrictions where the usage of certain services are restricted.
Creating an SSH tunnel with Putty
SSH tunnels may sound complex, but in reality they are very simple to configure on a Windows box using Putty. In this post I am going to run through the process of setting up a SSH tunnel with Putty, and then configuring Firefox to use the SSH tunnel as a SOCKS proxy to securely transfer web traffic over a network.
First open up Putty and enter the connection details for the remote SSH host we are going to tunnel the data too.
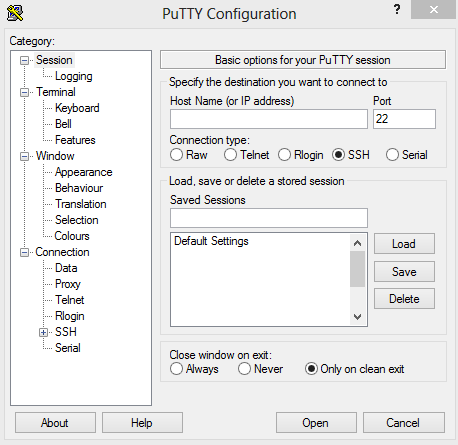
Next expand the SSH option in the side bar on the right under the “Connection” parent node and you should see a section labelled “Tunnels”.
Enter the port you would like to create the tunnel on. This is a port on the local machine which will act as a SOCKS proxy forwarding the data sent to the remote host over via SSH. For the purposes of this demonstration I am going to use port 8080. Also click the radio button labelled “Dynamic”, leaving the destination box above blank.

Now click the “Open” button down the bottom of the application and log in to the remote server via terminal using your new credentials as per usual.
To confirm the tunnel is working you can open a DOS command prompt and execute the command:
netstat -ano
In the results returned you should find a line showing that the local machine is listening for connections on port 8080:
TCP 127.0.0.1:8080 0.0.0.0:0 LISTENING 2680
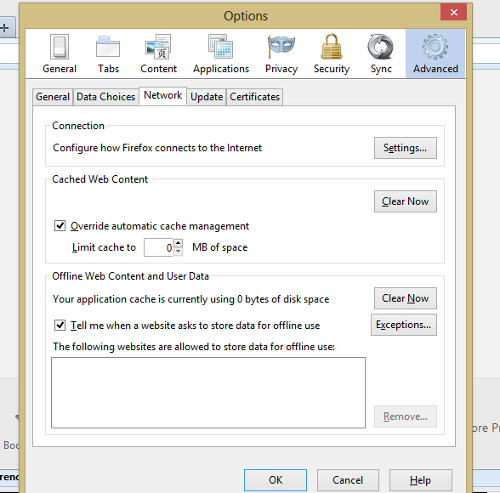
Now there is an active tunnel, we need to configure a web browser to take advantage of the tunnel. In this example I am going to use Mozilla Firefox, so although the process will be very similar in other browsers, it will vary slightly.
Open up Firefox on your machine, press (ALT + T) to bring up the tools menu and click on the “Options” entry. Click on the entry labelled “Advanced” up the top of the entries page. Then bring up the “Network” tab and click the “Settings” button next to the label “Configure how Firefox connects to the Internet”.
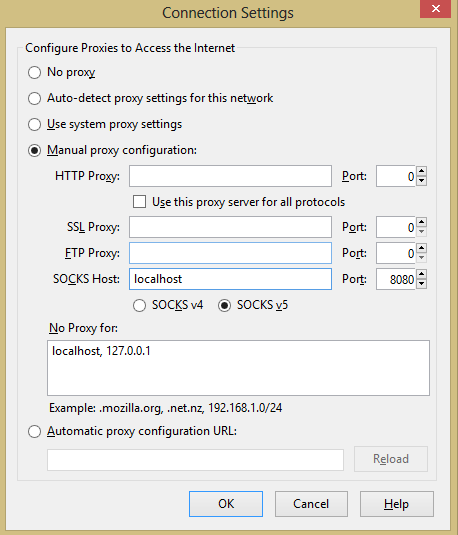
On this page select the radio button labelled “Manual proxy configuration”. Then next to the “SOCKS Host” heading enter localhost and port 8080 (or the port you setup your tunnel on). After clicking okay to leave this page your browser will now be sending all web requests via the remote host by use of the SSH tunnel.
To confirm this is the case search “What is my IP” using Google and it will return the IP address of the remote host you are connected to via SSH.